Brushed vs. Brushless Motors: Which is Right for Your Bike
- 08 Oct, 2025
Converting a regular cycle into an e-cycle—or upgrading an older build—starts with your drive choice: brushed or brushless. This guide explains both technologies in plain English, compares cost, efficiency, noise and maintenance, then walks you through a clean hub-motor install. Throughout, keywords like electric motor for electric bike, bike motor, motor for bike, electric motor kit for bike, and brushless hub motor link to parts you can source instantly.
How They Work (Plain & Simple)
Brushed DC (BDC) motors use carbon brushes and a commutator to switch current mechanically. They’re simple, cheap, and strong at low RPM, but brushes wear and add noise.
Brushless DC (BLDC) motors use electronic commutation (with Hall sensors or sensorless control). They require a controller, but deliver higher efficiency, quieter operation, cooler running, and longer life. Most modern brushless hub motor kits are BLDC for this reason.
Pros & Cons at a Glance
- Upfront Cost: Brushed wins; brushless costs a bit more initially.
- Efficiency & Range: Brushless wins—more km per charge, less heat.
- Noise: Brushed is audible; brushless is notably quieter.
- Maintenance: Brushed needs periodic brush/commutator care; brushless is largely maintenance-free.
- Ride Feel: Brushless + sine-wave controller = super-smooth starts and hill control.
Which One Should You Choose?
Choose Brushed if you’re on a strict budget, building a classroom/demo project, or riding short, flat city hops. It’s a good learning platform.
Choose Brushless if you want daily reliability, efficiency, and a premium throttle feel. For most commuters, a rear electric motor kit for bike using a BLDC hub is the sweet spot.
Fitment: Hub vs. Mid-Drive
Hub Motor (Front/Rear): Fastest install and easy maintenance. Rear hubs give better traction; front hubs simplify bikes with complex rear gears. A ready electric motor for electric bike kit keeps wiring straightforward.
Mid-Drive: Leverages the bike’s gears—excellent for steep hills and off-road torque—but pricier and more complex. Increases drivetrain wear.
Sizing Your System (Voltage · Power · Controller)
- Voltage: 24V (basic), 36V (balanced city rides), 48V (performance). Battery → controller → motor must match.
- Power: 250–350W for urban commutes; 500–750W for mixed terrain; 1000W+ for off-road only (confirm local rules).
- Controller: Square-wave (cheaper, torquey) vs. sine-wave (quiet, premium feel). BLDC + sine-wave = best refinement.
- Sensors: Hall-sensored hubs deliver gentle low-speed starts and better PAS behaviour.
Unsure which motor for bike fits? Start with 36V/250–500W for cities; scale up for heavy riders, cargo, or hills.
Parts Checklist (Hub Build)
- Wheel with hub motor (preferably a BLDC brushless hub motor)
- Controller matched to voltage/current
- Battery with BMS, connectors, inline fuse/breaker
- Throttle (thumb/twist), optional LCD, PAS sensor
- Brake cut-off levers for safety
- Torque arms (mandatory for ≥500W hubs)
- Wiring harness, heat-shrink, cable ties, protective loom
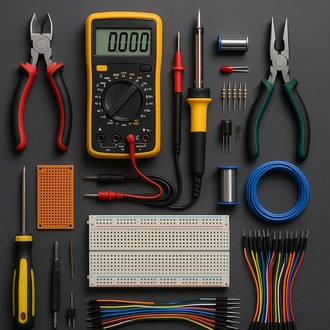
- Tools: spanners, hex set, tyre levers, multimeter
Step-by-Step DIY Installation (Hub Motor Focus)
- Prep the frame: Verify dropout spacing/alignment. For rear hubs, confirm freewheel/cassette compatibility and dish clearance.
- Mount the wheel: Seat axle flats fully in the dropouts. Fit torque arms (both sides for higher power). Tighten to spec.
- Place the controller: Mount on the downtube or rear rack with airflow and splash protection. Avoid tight cable bends.
- Wire the motor: Match phase wires (Y/G/B) and the Hall connector. Keep wires clear of spokes, chain and brake rotors.
- Connect peripherals: Throttle → controller; install PAS near the crank; plug brake cut-offs to disable power during braking.
- Battery hookup: Double-check polarity. Include an inline fuse/breaker close to the pack. Connect battery last.
- First power-on: Lift the wheel. Apply a little throttle. If it stutters or spins backward, swap any two phase wires (and the matching Hall pair).
- Dress the harness: Cable-tie along the frame, add loom/heat-shrink, leave drip loops for rain. Check full steering and suspension travel.
Controller Tuning & Setup
- Current limit: Start conservative; increase until acceleration feels right without overheating.
- Low-voltage cut-off (LVC): Protect your pack (e.g., ~39–40V for 48V batteries).
- PAS levels: Map 1–5 for predictable commuting; keep level-1 gentle for traffic.
- Regen braking: Enable on compatible brushless systems to reduce pad wear on long descents.
Maintenance: Brushed vs. Brushless
Brushed: Inspect/replace brushes, clean carbon dust, keep vents clear, check bearings and mounts.
Brushless: Minimal internal wear. Periodically check connectors, axle nuts, torque arms and cable grommets; keep sensors dry.
Cost & Lifespan Reality Check
Brushed systems are cheapest to start but need service and run warmer under sustained load. Brushless costs a bit more upfront, yet pays back via efficiency, quietness and low maintenance—ideal for daily riders. Over a year of commuting, energy savings and fewer parts usually offset the price difference.
Troubleshooting Quick Wins
- No spin: Check battery fuse/voltage, key/kill line, and connector seating.
- Jerky starts (BLDC): Phase/Hall mismatch—swap two phase wires (and matching Hall pair).
- Cut-outs under load: Battery sag—lower current limit or use a higher-C battery.
- Overheating: Long hills at high current—reduce current, add airflow, or upsize controller.
Safety & Legal Notes
On public roads in many regions, 250W with pedal-assist up to ~25 km/h is the typical non-registration class. Higher-power builds are best for private property/off-road. Always confirm local rules before riding.
FAQs
Front vs. rear hub? Rear hubs offer better traction and a cleaner look; front hubs are simpler on bikes with geared rear hubs. Use torque arms either way.
Can I upgrade later? Yes—start with a budget brushed bike motor, then switch to a BLDC electric motor kit for bike for range and smoothness.
What’s ideal for cities? 36V, 250–500W brushless rear hub with a sine-wave controller for quiet, efficient rides.
KitsGuru Recommendation
For most commuters and weekend riders, a brushless rear electric motor for electric bike at 36–48V gives the best mix of cost, comfort and reliability. If your budget is ultra-tight or you’re building a teaching demo, a brushed setup works—just plan for brush service and slightly lower range.
Next Steps
Explore our curated motor for bike collections to mix and match motors, controllers, throttles, PAS sensors, and accessories. Whether you need a simple upgrade or a complete electric motor kit for bike, follow the DIY steps above for a clean, dependable install.


