Electric Cycle Conversion Kit Buying Guide: 5 Things to Know Before You Convert
- 28 Oct, 2025
One of the best ways for people who commute every day to get around is to turn their regular bike into an electric bike. You don't have to spend ₹35,000–₹1,00,000 on a new electric cycle. Instead, you can install an electric cycle conversion kit on your current frame and get the benefits of electric assistance for a lot less money. This upgrade will not only save you money, but it will also make your bike last longer. Before you convert, though, you need to know which motor, battery capacity, controller, and accessories are best for you.
We'll look at five important things to think about before buying a conversion kit in this guide. Making an informed choice will make sure that your ride is smooth and safe, whether you want range, performance, hill climbing efficiency, or reliability for your daily city commute.
1) Pick the Right Type of Motor and Power Output
The motor is what makes an electric cycle work. When choosing a kit, the type of motor electric cycle configuration you choose is very important for performance. Some of the most popular choices are:
- Front Hub Motor: Simple to set up and light.
- Rear Hub Motor: Better grip, good for carrying heavy loads and going over rough ground.
- Mid Drive Motor: More expensive, but has more torque for climbing hills.
The amount of power a motor has is measured in watts (W). Some common ratings are 250W, 350W, 500W, and 1000W. In India, 250W is considered non-motorized assistance and is usually allowed without having to register. 350–500W, on the other hand, gives heavier riders better hill assist.
An electric cycle gear motor might be a good choice if you need more power to climb or perform off-road. This is because it has more torque output due to internal gear reduction. Gear motors work better at low speeds, which makes them great for city traffic that stops and goes.
2) Choose the Right Battery Size for Your Daily Needs
The type of battery you choose will determine how far your cycle can go on a single charge. Lithium-ion batteries are the best choice for the industry because they are light and last a long time. Ah (Ampere-hour) is the unit of measure for battery capacity. Distance ranges that are close to:
- 7.5Ah: 22–30 km (for commuting and light use)
- 10Ah: 30–45 km (for getting around in the city)
- 15Ah: 45–60+ km (for longer trips)
A battery with a bigger capacity costs more but needs to be charged less often. Before choosing capacity, think about your daily route and how high it is (flyovers, slopes). Placement of the battery is also important:
- Rear Carrier Style: Easy to put on and feels balanced for city use.
- Down Tube Style: Looks better and is more stable.
The newest lithium-ion cells, like the 18650 and 21700 types, last longer, are safer, and work better in hot weather, which is perfect for India.
3) Get to Know the Controller & Sensors
The controller is like the "brain" of your electric system. It decides how much power to send to the motor based on what you tell it. Two types of sensors that are often used:
- PAS (Pedal Assist Sensor): Only helps when you pedal, which makes the battery last longer.
- Throttle Control: Just like a scooter, you twist it and go.
Modern controllers often include LCD screens that show speed, battery percentage, distance traveled, and assist levels.
For smooth acceleration and safety, it's important to choose a good controller. A controller that isn't set up correctly could make things move jerkily, overheat wires, or drain the battery faster. If you plan deeper tuning, browse dedicated ebike controller options that match your chosen motor.
4) Tools & Materials Needed for Installation
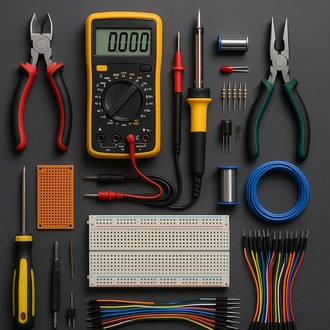
Many kits are plug-and-play, but you need to know a little bit about mechanics to change your bike. Some important electric cycle tools are:
- Set of Allen keys
- Set of spanners
- Pedal removal wrench
- Zip ties for tidy cable routing
Front hub kits are the easiest for beginners to put together (a great starting hub motor kit). You might need tools to take off the freewheel for rear hub kits. If you're not sure how to wire things up, it's best to hire a pro to do it—incorrect wiring can damage the controller, throttle, or display.
If you ride during the monsoon, make sure your connections are water-proof and use heat-shrink where possible.
5) Charging Time, Warranty & Total Cost
A lot of people want to know charging wali cycle ki price. The price depends on:
- Motor power (e.g., 250W vs 500W)
- Battery capacity (Ah & chemistry)
- Brand quality & waterproofing
- Warranty coverage and after-sales support
The price of a good conversion kit ranges from ₹8,000 to ₹22,000, depending on what accessories come with it. Premium batteries, waterproof connectors, and digital displays are included in higher-end kits. Explore current bundles in the electric cycle kit category—many customers also search the same page for an e cycle kit, ebike motor, or “kit cycle”.
Bonus: Safety Tips All Riders Should Follow
- Always wear a certified helmet and gloves.
- Use reflective tape and strong lights for night visibility.
- Check wire insulation regularly and avoid pinch points.
- Do not overload rear carrier batteries; respect max payload.
- Route brake and motor cables cleanly to prevent snagging.
Quick Weekly Maintenance Checklist
- Brake pad condition and cable/hydraulic feel
- Tire pressure & tread wear
- Chain lubrication and drivetrain cleanliness
- Battery connector cleanliness and snug fit
Do not wash the controller or battery case with high-pressure water. A small bead of silicone sealant helps guard against moisture ingress at connectors.
Who Should Convert?
For the best results, use a conversion kit if you’re among the following:
- Daily office commuters seeking sweat-less rides
- Students riding short city distances
- Older riders who want gentle pedal assistance
- Urban cyclists focused on fitness with occasional boost
Riders who face dense traffic will appreciate smooth electric acceleration. Hill commuters benefit from torque-assisted climbs—especially with a quality hub motor kit.
DIY Corner: E-Bike Controllers (Types, Wiring & Troubleshooting)
If you're building or updating your own electric bike, the controller is the brain of the system. It controls the power transfer from your battery to your motor, which affects speed, acceleration, braking, and even battery life. No matter how much experience you have, knowing how to install and use an ebike controller will make your ride better.
What Is It & Why It Matters
An ebike controller is an electronic device that connects your battery to the ebike motor. It meters power based on pedal-assist level, throttle position, and sensor inputs—functioning like an ECU for your bike.
Controller Types
- Brushed DC Controllers: Simple and affordable; common on basic builds.
- Brushless DC (BLDC) Controllers: Ideal with an ebike hub motor—quiet, efficient, and smooth.
- Sine-wave: Very smooth, quiet acceleration—popular for premium kits.
- Square-wave: Cheaper, punchy torque, slightly rougher feel.
How They Work
The controller reads throttle, brake cut-offs, pedal cadence/torque sensors, and speed sensors. Its algorithms then regulate output to your electric motor hub kit; some systems support light regenerative braking. When upgrading from generic hardware, confirm connectors and phase/hall wire order.
DIY Wiring Steps
- List your parts: Battery, motor, throttle, PAS sensor, display (optional). Match connector types.
- Mount & connect battery: Connect main power last; double-check polarity to avoid shorts.
- Hook up motor: Join three phase leads (Y/G/B typically) and hall sensor plug to the controller.
- Connect controls: Wire throttle, PAS, brake cut-offs; tidy cables with zip ties.
- Power test: Lift wheel, apply gentle throttle—confirm smooth spin and correct direction.
Troubleshooting
- Motor won’t turn: Check hall plug seating and phase order on your electric motor ebike setup.
- Jerky take-off: Ensure sine/square controller settings match motor type.
- No power: Verify battery voltage and fuse; inspect main connector.
- Overheating: Use a controller matched to motor current; ensure airflow.
Choosing the Right Box
Match controller voltage (24/36/48V) to the battery, select current slightly above motor spec, ensure connector compatibility, and choose a compact enclosure for tighter frames. For curated options, explore KitsGuru’s ebike controller collection.
Wrap-Up & Where to Buy
Electric cycle conversion kits are a cost-effective and eco-friendly upgrade. With the right motor, battery, controller, and accessories, any bicycle can become a confident daily commuter. Start with a balanced electric cycle kit (also called an e cycle kit) and pair it with a compatible controller and reliable ebike motor. If you prefer a ready bundle, a hub motor kit under the same “kit cycle” category is a simple path to success.
Browse motors, batteries, tools, and waterproof connectors here: Electric Bike Kits @ KitsGuru and pair with smart controls from E-Bike Controllers @ KitsGuru.


